Sunday, May 30, 2010

Where are Uploaded Photos on Blogspot Saved?

How to check uploaded photos on Blogger?
Where is my photos saved in Blogspot?
How to delete uploaded photos from Blogspot's server?

When you upload photos while writing a blog post, the image code automatically appears and sometimes you wonder where it is saved.

In case you don't know, they are actually uploaded and saved into Picasa Web Albums linked to your Google Account, which is the also the account you use to log-in Blogspot.

picasa logo

Once you're in Picasa, you might need to log-in with your Google account. After that, you'll see your available albums.

picasa albums

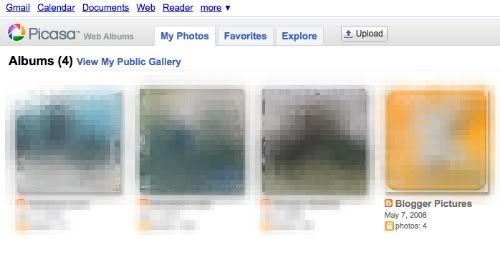
You'll be able to see albums for all the blogs associated with your Google account. There is a special album "Blogger Pictures" just for your uploaded profile pictures as well.

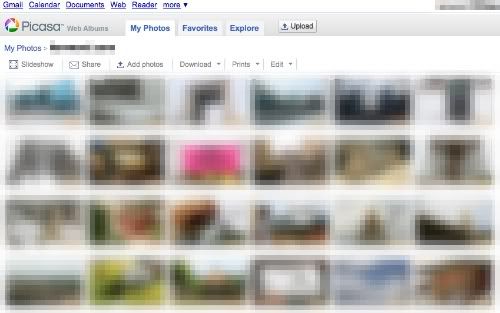
Click on any of the albums to view the photos you've uploaded.

picasa photos

Every album has a limit of 1000 photos and a new album will be automatically created when a current album is full.

With that, you'll be able to upkeep the album and delete any unnecessary not-used photos uploaded previously.

Duplicates are advised to be deleted as well because it saves space. But be careful not to delete images that are currently in-use in your blog, or else the image link will be broken and will not be displayed on your blog.

Sunday, May 23, 2010

12 Things To Do After Creating New Blogspot Blog

What to do after creating a new Blogspot blog?
What necessary actions need to be taken with a new blog?

Here are 12 things you should do after setting up a new blog with Blogspot.

First, head to the Settings and you'll be on the "Basic" section.

1) Make sure you have a good blog title and description.

blogger title description

2) If you want to drive traffic to the blog, pick "Yes" for "Add your blog to our listings?" and "Let search engines find your blog?"

blogger listing

After that, head on to the "Formatting" section.

3) Select the number of posts you want to be shown on the main page. The lesser the posts, the faster the loading speed of the homepage.

blogger number of posts

4) Adjust the time zone depending on which country you reside in.

blogger time zone

Then, continue to the "Comments" section.

5) Select who can comment on your blog. It depends on how much you welcome comments from strangers.

blogger who can comment

6) Select the type of comment form placement you want. There are 3 choices and each of them are different. I'd recommend it to be embedded below post.

blogger comment form

7) If you would like to display backlinks to your blog posts, select "Show" and the links will be shown. Indirectly, your readers will be able to access to the links if they are interested.

blogger backlinks

8) If you prefer to keep track and moderate the comments received on the blog, select "Always". Comments submitted will not be shown immediately as a result. Otherwise, select "Never".

blogger comment moderation

9) I personally don't like guessing some funny words and type them out just to make sure I'm not a robot or some sort. But if you really want to prevent spam, by all means, say "Yes" to word verification.

blogger word verification

10) If you like to see profile images of the commentators on the comment section, selecting "Yes" would be a good option.

blogger profile image

Next, the "Site Feed" section.

11) Remember to allow the default feed on your blog so that people can subscribe to your blog and receive updates easily.

blogger allow feed

12) If you have created a custom feed on Feedburner or some other external feed manager, do include the feed link as well. It will automatically redirect your default feed to the custom feed.

blogger redirect feed

And that's all for now. Hope this guide will help those who've just started a new Blogspot blog.

Sunday, May 16, 2010

How To Change Dimension of Photo Manually on Blogspot

How to modify the photo resolution on Blogger?
How to change size of photo manually on Blogspot?
How to edit the picture size on photos uploaded on Blogspot?

If you want to manually change the dimension, or distort the size, of a particular photo uploaded on Blogger, here's how.

This is the sample picture.


After uploading, check the code and look for "width:" and "height:" from the photo code.

<a onblur="try {parent.deselectBloggerImageGracefully();} catch(e) {}" href="http://3.bp.blogspot.com/_h8eC61avCMk/Sj47sGxezHI/AAAAAAAAA-8/yxPvykDZdDQ/s1600-h/asian.jpg"><img style="display: block; margin: 0px auto 10px; text-align: center; cursor: pointer; width: 400px; height: 265px;" src="http://3.bp.blogspot.com/_h8eC61avCMk/Sj47sGxezHI/AAAAAAAAA-8/yxPvykDZdDQ/s400/asian.jpg" alt="" id="BLOGGER_PHOTO_ID_5466089975697168450" border="0" /></a>

Then change the pixels to your desired dimension.

Here's an example of "width: 200px; height: 500px;".


Enjoy changing the dimension!

Friday, May 14, 2010

How To Remove Link on Photos Uploaded to Blogger

How to disable linking on photos uploaded on Blogspot?
How to unlink the pictures on Blogspot?

Everytime when you upload a picture onto your blog post, the picture will be automatically linked to its original sized picture.

If you want to disable/remove the auto-linking, here's how.

honey jar
Here's one picture freshly uploaded onto this blog post. As you can see, whenever you mouse-over the picture, the cursor will change to a pointer style and it's clickable.

To remove the link, you have to dig into the code of the photo.

<a onblur="try {parent.deselectBloggerImageGracefully();} catch(e) {}" href="http://2.bp.blogspot.com/_h8eC61avCMk/SlYZCOEdQ-I/AAAAAAAABCU/v0M-TPWHbVk/s1600-h/honey.jpg"><img style="display: block; margin: 0px auto 10px; text-align: center; cursor: pointer; width: 300px; height: 400px;" src="http://2.bp.blogspot.com/_h8eC61avCMk/SlYZCOEdQ-I/AAAAAAAABCU/v0M-TPWHbVk/s400/honey.jpg" alt="" id="BLOGGER_PHOTO_ID_5466089975697168450" border="0" /></a>

As you can see from the code above, you should remove the code highlighted in orange to remove the link.

Therefore, this would be the remaining code.

<img style="display: block; margin: 0px auto 10px; text-align: center; cursor: pointer; width: 300px; height: 400px;" src="https://blogger.googleusercontent.com/img/b/R29vZ2xl/AVvXsEhnVrqdk13Vpvi-fgPXo_3EPQ3D68V5TDVl73mLReAQWgwQ_M4MChjrVdVKL9PQcRu1_fR7CIHQRJ50l20HraHVl3SiTDSt8-29uMNIKEegFRJdvzKuTkpk87Un8SeSqMCI5mHRtr24KkqW/s400/honey.jpg" alt="" id="BLOGGER_PHOTO_ID_5466089975697168450" border="0" />

However, if you want to remove the pointer cursor as well, you should remove the "cursor" part from the remaining code.

And this would be the final picture.

honey jar
Now the picture is not linked, not clickable and the cursor doesn't change to a pointer whenever you mouse-over it.

That's it!

Saturday, May 8, 2010

How To Change Default Photo Size Uploaded on Blogspot

How to change the size on photos uploaded on Blogger?
How to set the original photo size on Blogspot?
How to modify the size of photos uploaded on Blogspot via Picasa?
How to change the photos uploaded on Blogspot to the original size?
How to edit the size of the photos uploaded on Blogspot?

If you have uploaded a photo bigger than the default 400px x 400px maximum width and height on Blogspot and would like to display its original size, here's how.

baby tiger

Here's a demonstration: You uploaded this (tiger) picture onto your Blogspot (which is originally larger at 1071px x 1600px), and you want it to be displayed on a bigger scale. What you need to do is to look at the HTML section of the particular blog post.

Look for the code lines for the picture. It will look somehow like this.

<a href="https://blogger.googleusercontent.com/img/b/R29vZ2xl/AVvXsEg8c5xKOBdDcQ8tQKPvxfs7PKqb8axwCvH0YEtU77TYU1OK-Xi42cKWobBnVtSkwsYJa5mOdjMZJiZKMJ-h7IOSQOgyG4oa2d41IT1XLwkOZsOzcn2jpH8pnSxdVPDmi3uD6XkLJnuEBTYD/s1600/IMG_5331.JPG" onblur="try {parent.deselectBloggerImageGracefully();} catch(e) {}"><img style="display: block; margin: 0px auto 10px; text-align: center; cursor: pointer; width: 400px; height: 300px;" src="https://blogger.googleusercontent.com/img/b/R29vZ2xl/AVvXsEitqkvboK545Ri5iLu1OVXvBcvoE6mr_2eQ5B7mqVHFQ7ptFdyMiuq1F8XAi18_FJISk_4GCZT05Nm8UX3faLqft2y7qrizCCyGq_DsC9RCfLQy0zg_ELYAFr2sCHC_NH2JNVlAaRq3jADj/s400/DSC_0232.JPG" alt="" id="BLOGGER_PHOTO_ID_5466089975697168450" border="0" /></a>

Firstly, remove "width: 400px; height: 300px;" from the code. If you don't, the image stays at whatever size indicated by these 2 values.

Then, all you need to do is to change the URL's (highlighted in Orange) "s400" or "s320" (depending on your default upload size) part.

Change it to:
  • s800 - for medium size.
  • s1600 - for full size.
Also, you can change it to s[any value], where [any value] represents the preferred width of the image. (Example - s500, s900, etc, but no more than s1600)

For this example, it's s800. When it's changed to s800, the medium size of the photo shown.

baby tiger

Now the displayed photo size is 536px x 800px.

Likewise, change it to "s1600" if you want to display to full size of the photo. Any value more than "1600" will not work.

Take note: s800 and s1600 has no connection with the height and width, and may show different results compared to the demonstration shown here. It varies depending on the original size of your uploaded photo.

Any questions are welcomed.

Related Posts Plugin for WordPress, Blogger...
Follow Me on Twitter