Friday, December 31, 2010

Basic Guide to Use Neobux

UPDATE 9 April 2011: If you don't upgrade your NeoBux account and remains at an ordinary account, you'll only earn $0.001 per click! That's 1/10 of the previous earning, which was $0.01. Therefore you can't earn fast. Head on to OnBux, which will earn you $0.01/click! Click here for proof of payment from OnBux!

---

How to use Neobux?
How to earn money with Neobux?
Now to view advertisements on Neobux?

neobux logo

This is a basic and simple guide on how to earn money online with Neobux.

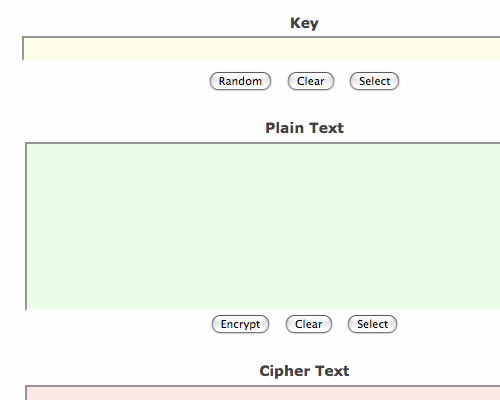
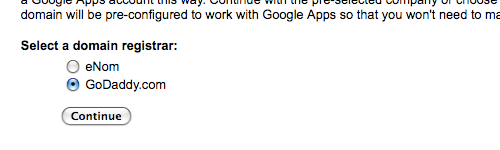
1) Firstly, you need an account at Neobux. Register an account and log in.

neobux member login

Enter your username, password, secondary password (optional, depends on your registration) and verification code. Click "send".

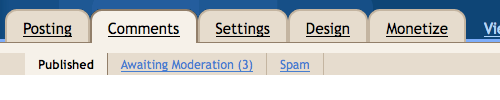
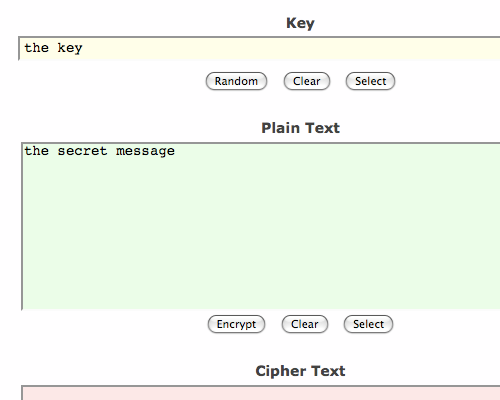
2) Once inside your account, look at the top of the website.

neobux view advertisements

If advertisements are available, there will be a green box with a number (indicating the number of ads available, normally 4) beside "View Advertisements". Click on it.

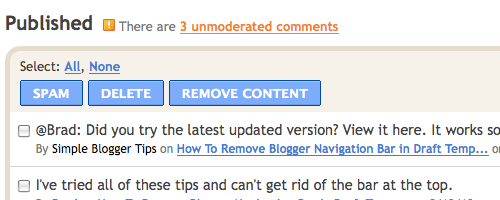
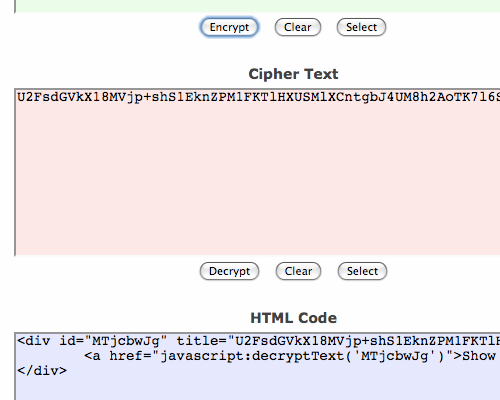
3) After that, you'll see boxes that represents each available advertisement.

neobux advertisements

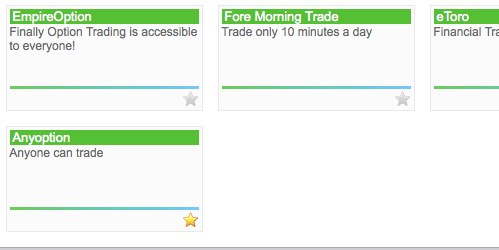
A yellow star below the box indicates that it's not clicked for the day yet. A gray star indicates that the advertisement was already clicked. It refreshes daily, so it's advisable to log in daily to view the ads.

To view a particular advertisement, click on the box.

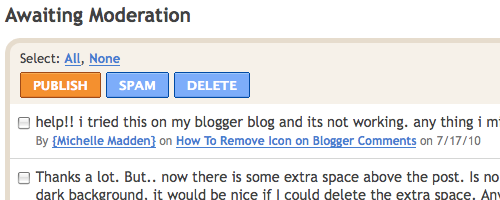
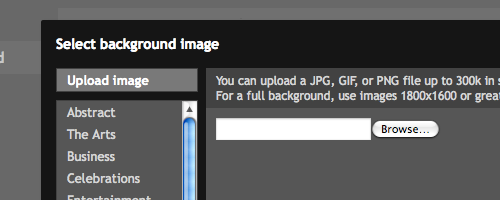
4) Then, click on the red dot that appears at random locations within the box.

neobux click advertisements

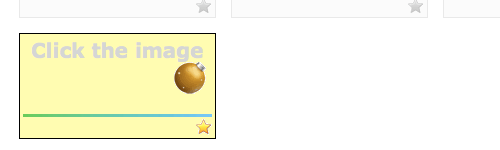
It's usually a red dot, but since it's Christmas when this screen shot is made - Neobux changed the red dot to a Christmas ornaments. Still works the same.

This method is obviously to prevent bots and requires a human interaction.

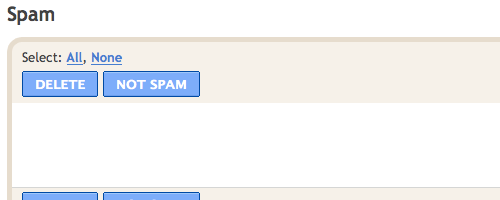
5) After clicking on the red dot, a new page will appear on the browser. That's where the advertisement website loads.

neobux advertisement loading

The loading of each advertisement will take about 30 seconds or more, depending on content of the website.

Wait for the progress bar to be covered with yellow. While waiting, do not view other advertisements. It's supposed to be viewed one by one.

6) After the progress bar is completed, you'll see an advertisement validation.

neobux advertisement done

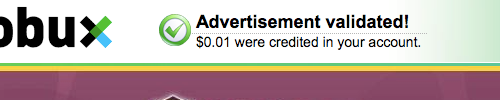
It will appear over the progress bar previously and it indicates that the advertisement click is successful. Good job and you have $0.01 credited into your account.

Continue with clicking on the rest of the advertisements available. Remember to view every single advertisements every day to earn the maximum money for basic steps.

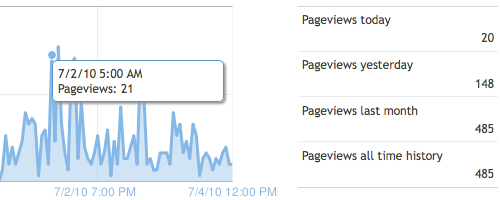
7) You may view your daily earning chart at your account information section. Just click on your username at the top of the website.

neobux earning chart

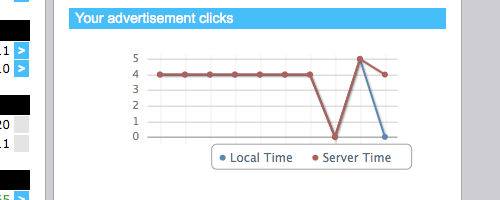
From this chart, you can view your activeness by checking the number of clicks you've made in the recent days. A day without advertisement views can be a waste.

8) Click on your Neobux advertisements daily and once you've reached the minimum cash out amount, you can transfer the money to AlertPay, PayPal or NETELLER.

neobux payment

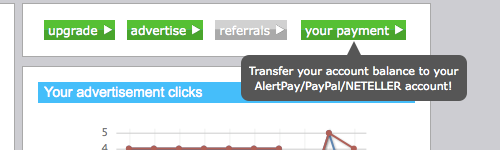
Click on "your payment" above the chart and proceed by following the instructions.

One thing is for sure, it really works and it pays. Why don't you try as well? There's no harm earning some extra income with Neobux. Just remember to view all the advertisements every day.

Take note: This guide is only the basic steps which are required at the start of your registration. After earning more, you can earn even more by getting referrals. But that will be on an Advanced Guide. Stay tuned!

Saturday, December 18, 2010

Top 4 Free Blogging Platform

Here are the top 4 free blogging platform by Simple Blogger Tips.

blogger logo

Blogger.com - Majority of the bloggers started of with Blogger. A great starting site to get a taste of blogging, very easy to use. Has almost everything you need from widgets to template designing and modification. The entries are easily indexed by Google search engine because it's owned by Google.

wordpress logo

WordPress.com - The free and easy way to blog with Wordpress without the need of technical blog installation knowledge. It has most of the latest features but with limited access over the modification of the preset template. As a result, advertisements from external parties aren't allowed. Nevertheless, it offers inspiring writers to pen down their words professionally.

tumblr logo

Tumblr.com - Probably the easiest way to blog. A platform with a focus on allowing media-rich posts. Suitable for those who love to share photos, videos and links without the need to lengthy words. Allows others to re-blog a particular post as well, that's the unique feature of Tumblr.

posterous logo

Posterous.com - Labeled themselves as the easiest way to share photos, collaborate with others, share new ideas, create a travel journal, share passions and share videos. The unique feature about Posterous is that you don't need to sign up, know any code or even know how to do anything. Just send an email to set up your own Posterous blog and start sharing your ideas and media.

Saturday, December 11, 2010

Earn Money Online with NeoBux

UPDATE 9 April 2011: If you don't upgrade your NeoBux account and remains at an ordinary account, you'll only earn $0.001 per click! That's 1/10 of the previous earning, which was $0.01. Therefore you can't earn fast. Head on to OnBux, which will earn you $0.01/click! Click here for proof of payment from OnBux!

---

How to earn money online?
How to earn income from the Internet?
How to make money with Neobux?
How to generate income online?

Want to make some side income from the Internet? I've been earning some cash through the Internet. Honestly, there are many methods and techniques - and one of the ways is by using NeoBux.

neobux logo

NeoBux is a pay-as-you-surf site. All you have to do is to surf the sites (usually 4 sites a day if you're using the normal account) given everyday, and earn tiny (US$0.01/site) income. You might think it's too little at the start, but once you learn and explore more - you'll start earning big.

Most importantly is to get referrals. Be it direct referrals or rented referrals - whenever they click on a particular day, you'll earn half of their earnings. It's a win-win situation.

Try it now!


Cash up your PayPal with NeoBux

Once you're already signed up, don't forget to click everday.

Take note, NeoBux is not a scam. It really pays you. All you need is a PayPal account, and once your accumulated earning passes the minimum cash out limit, you can transfer the money immediately to your PayPal account. As easy as that!

Feel free to ask if you have any questions.

Saturday, October 9, 2010

How to Add Official Tweet Button to Blog

How to add Tweet Button on Blogger blog?
How to add Tweet Button on Blogspot blog?
How to add official Tweet Button on Blogger blog?
How to add official Tweet Button on Blogspot blog?

You want to add the official Tweet Button at the end (or at the top) of each of your blog post, here's how.

official tweet button

Firstly, go to Dashboard > Design > Edit HTML. Then click Expand Widget Templates.

Search for this code:

<data:post.body/>
<div style='clear: both;'/> <!-- clear for photos floats -->

Then, here's the code to add the Tweet Button.

<div style='align:left;'>
<a class='twitter-share-button' data-count='horizontal' data-lang='en' data-via='simpleblogrtips' expr:data-text='data:post.title' expr:data-url='data:post.url' href='http://twitter.com/share' rel='nofollow'>Tweet</a>
<b:if cond='data:post.isFirstPost'>
<script src='http://platform.twitter.com/widgets.js' type='text/javascript'>
</script>
</b:if>
</div>

Take note that the code is different from the code generated on Twitter Tweet Button page because it is modified for better performance.

---

Where to add Tweet Button?

To add it above each blog post, add the code before <data:post.body/>.

To add it after each blog post, add the code after <div style='clear: both;'/> <!-- clear for photos floats -->.

To distance the button away from the blog post, add <br/> before or after the Tweet Button code depending on where to put it.

Click "Save Template" and you're done.

---

How to customize Tweet Button?

1) To change button style, change "horizontal" to "vertical" or "none".

twitter button vertical
vertical

twitter button horizontal
horizontal

twitter button
none

2) To change via Twitter account, change "simpleblogrtips" to your preferred Twitter account.

That's all for now!

Tuesday, September 21, 2010

Getting a Domain or a Web Hosting, or Both

Difference between getting a domain or a web hosting, or both.
Why purchase a custom domain name?
Why purchase a web hosting?
Can I just purchase a custom domain for Blogger?
Why purchase a custom domain and a web hosting?
Explanation of getting a domain and a web hosting.

domain name extensions

---

Why purchase a custom domain name?

You purchase a domain because you want your website or blog to have a better link address. Unlike having a totally free blog on Blogger.com or Wordpress.com, where you're given a sub-domain like "abc.blogspot.com" or "abc.wordpress.com".

Getting a custom domain is basically about making it cooler, and probably shorter without the "blogspot.com" and "wordpress.com" extension. That means you get to have "abc.com" or "abc.net" etc.

---

Why purchase a Web Hosting?

Getting your own web hosting means you're having your website hosted, but with a fee included. You can pay it monthly, or yearly depending on your preference. However, sometimes it'll be cheaper if you pay yearly.

When you're on Blogger.com or Wordpress.com, you're actually hosting your blog on their site. Furthermore, it's free-of-charge and you don't have to worry about the hosting issues. You'll only be given the blogging interface and you blog, that's all.

But when you're on an external web hosting, you'll need to download a blogging platform (Wordpress is the common one), install it on the web host, set up your database, redirect your domain and blog.

---

Can I just purchase a custom domain for Blogspot?

Yes you can. If you have a blog on "abc.blogspot.com" and you purchase "abc.com", both links will bring you to the same blog/website.

In fact, you can purchase it via Blogger itself. Read: How to buy a custom domain for Blogger.

In this case, there's no new blog or old blog when you've only bought a domain for your Blogger.com blog - it's actually the same. Just the address has changed.

---

What about purchasing a domain and a web hosting?

For this matter, you'll have to host a self-hosted Wordpress (or your preferred blogging platform) blog, unlike Wordpress.com and Blogger.com.

If you get a web host, downloaded and installed Wordpress, it's a new Wordpress blog. (Click here to download Wordpress from Wordpress.org)

Don't worry about leaving your old Blogger.com blog posts, because you can import your old entries - there's a function in Wordpress that allows you to import entries from other blogs.

After you've gotten yourself a web host, "abc.blogspot.com" and "abc.com" (or any new domain) are two DIFFERENT websites.

Take note: Wordpress.com and Wordpress.org are not the same.

---

Simplified Explanation

Blogger with added domain = Same house, new address. But still use the old address.
Migrate to self-hosted Wordpress = New house, new address. Old address will bring you to your old home.

Saturday, September 18, 2010

How to Add Facebook Like Button on Blogger

How to add Facebook Recommend Button on Blogger blog?
How to add Facebook Like Button on Blogspot blog?
How to customize Facebook Like Button on Blogger?
How to customize Facebook Recommend Button on Blogger?

You want to add the official Facebook Like or Recommend Button at the end (or at the top) of each of your blog post, here's how.

facebook like button

Firstly, go to Dashboard > Design > Edit HTML. Then click Expand Widget Templates.

Search for this code:

<data:post.body/>
<div style='clear: both;'/> <!-- clear for photos floats -->

Then, here's the code to add the Facebook Like Button.

<iframe allowTransparency='true' expr:src='&quot;http://www.facebook.com/plugins/like.php?href=&quot; + data:post.url + &quot;&amp;layout=standard&amp;show_faces=false&amp;width=100&amp;action=like&amp;font=arial&amp;colorscheme=light&quot;' frameborder='0' scrolling='no' style='border:none; overflow:hidden; width:450px; height:40px;'/>

---

Where to add Facebook Like Button?

To add it above each blog post, add the code before <data:post.body/>.

To add it after each blog post, add the code after <div style='clear: both;'/> <!-- clear for photos floats -->.

To distance the button away from the blog post, add <br/> before or after the Facebook Like Button code depending on where to put it.

Click "Save Template" and you're done.

---

How to customize Facebook Like Button?

1) To show Facebook Profile pictures/faces of people who "Liked/Recommended" the blog post, change "false" to "true".

2) To use different action on the Facebook Button, change "like" to "recommend". Decide which is suitable for you.

3) To change the font, change "arial" to either "lucida+grande", "segoe+ui", "tahoma", "trebuchet+ms" or "verdana". Decide which is suitable for you.

4) To change the colour scheme, change between "light", "dark" or "dark". It represents the background colour your blog uses. If it's light colours use "light", if it's dark use "dark" and "evil" is somehow the same.

5) To change the width or height of the button, change them accordingly.

That's all for now!

Wednesday, September 8, 2010

How to Add Signature to Blog Posts

How to add signature to blog entry?
How to add photo at the bottom of blog post?
How to add photo at the bottom of each blog entry?
How to add image at the bottom of each blog post?
How to include signature at the blog post?
How to include signature to blog entry?
How to include photo at bottom of blog post?
How to include image at the blog post?

You want to add a permanent signature or a picture at the end of each of your blog post, here's how.

blog signature

Firstly, go to Dashboard > Design > Edit HTML. Then click Expand Widget Templates.

Search for this code:

<data:post.body/>

You'll need to include the signature below this code. There are 2 types of including signatures - Text and Image.

---

Signature 1 - Text

Then write your signature text below the <data:post.body/> code, and preview it so that you can make adjustments.

If it appears on the line right after the blog post ends, you can include <br/> before the signature text so that there will be a space between them.

That's it if you just want to have a text signature at the bottom of each of your blog entry.

---

Signature 2 - Image

You want to have an image as your signature, you should add this code below the <data:post.body/> code instead.

<img src='http://imagelink'/>

Replace the http://imagelink with your signature image URL link.

By default, it's aligned to the left.

To align it to the center, use this code.

<center><img src='http://imagelink'/></center>

To align it to the right, use this code.

<div style='text-align: right;'><img src='http://imagelink'/></div>

Remember to replace the http://imagelink with the your image URL link.

Preview, make adjustments with line break code - <br/> - if necessary. Save it and you're done.

---

If you want the image to have an invisible background, meaning that you just want the signature image/text to be displayed only without the background - you'll have to create one for yourself (with Photoshop) and save it as .png or .gif file without any background layer.

Monday, September 6, 2010

Blogger in Draft New Widgets - Popular Posts and Blog's Stats

How to add Popular Posts widget on Blogger blog?
How to display popular posts on Blogger blog?
How to show popular posts on Blogspot blog?

How to add Blog Stats widget on Blogger blog?
How to display blog's visitors and page views stats on Blogger blog?
How to show blog traffic statistics on Blogspot blog?

Blogger in Draft is out with 2 new widgets - the Popular Posts widget and Blog's Stats widget.

blogger popular posts and stats new widgets

Take note, they can only be seen when you're on Blogger in Draft. The normal Blogger doesn't have it yet.

On the Popular Posts widget, these are the available settings.

blogger popular posts widget

You can set the most view posts duration period and whether to include an image thumbnail (which is normally the first picture of the blog post) and also the snippet.

Unfortunately you can set the number of displayed blog posts right now. The fixed number is 10. Hopefully Blogger will add in the blog count feature as well later on.

On the Blog's Stats widget, these are the available settings.

blogger stats widget

Here, you can edit the stats style and the options.

That's all for now. Hopefully these additional Blogger widgets are useful for some of you!

Friday, September 3, 2010

How to Add Floating Twitter Button on Blogger Blog

How to add twitter button on Blogger blog?
How to add Follow Me on Twitter badge on Blogspot blog?
How to add Follow Us on Twitter badge on Blogspot blog?
How to add Twitter Follow Me button on blog?
How to add Twitter Follow Us button on blog?
How to add link to Twitter page on Blogger blog?

Firstly, go to Dashboard > Design > Edit HTML.

follow on twitter button

Then search for </b:skin> and add this code before it.

#twitter-follow { border: 0; position: fixed; top: 300px; right: 0;}

To change the position of the Twitter button, you can change "300" (distance from the top) and "right" to "left" if you want the button to be on the left.

Then search for </body> and add this code before it.

<div id='twitter-follow'> <a href='http://twitter.com/username' target='_blank'><img alt='Follow Me on Twitter' src='https://blogger.googleusercontent.com/img/b/R29vZ2xl/AVvXsEhOeKg0AmdWXOgzJz0JyWO5QasvsrKDYSPnuqeC2K1rWQe5ybvjACGYGD7w83RTTRISQrRS_-O0oRifxW6dm9VELAPytZelI_rmYgP3P33xLLub_m1DiA2VFslKwU_0GUtpEIws53DM4Hc/s1600/twitter+follow+me+button.gif'/></a></div>

twitter follow us button

Remember to change the "username" to your Twitter account username.

If you want it to be "Follow Us on Twitter", use this image link - https://blogger.googleusercontent.com/img/b/R29vZ2xl/AVvXsEg9Y0E-SZ3sob3A3dgnKcz4NrxLk5tbYObJcll-XqNoljLbB0BAJtboX_D1QexX89sffI3X_XDxMSaklAojuWLAClIOlcXBLrFRJi4GkkRFqAbkGOMg_i0wvQdUNc3Shz-5za35lP32To8/s1600/twitter+follow+us+button.gif

twitter follow us button

Enjoy and all the best in getting more followers on Twitter!

Friday, August 13, 2010

Blogger New Commenting Feature

Blogspot has a new feature implemented again - this time it's a new feature for comments.

Now you can manage the comments received on your Blogger blog. It will be with one of the tabs with the other navigation, such as Edit Post, Settings, Designs and Monetize.

Here's how the navigation bar look now.

blogger comment feature navigation
With the commenting feature, now you can easily check on published comments, comments that are awaiting moderation and spam comments.

To be honest, it's almost like Wordpress now - except Wordpress has a "Trash" are once you deleted a particular comment, probably just in case you want to recover it back.

But when you delete comments on Blogspot, that cannot be undone.

blogger comment published

This is how the "Published" section look like - with complete information such as comment author, commented blog post and the date.

blogger comment awaiting moderation

Comments "Awaiting Moderation" section. It's self-explanatory.

blogger comment spam

And lastly, the "Spam" section. Haven't gotten any in my spam inbox right now, hopefully it works against automated spam comment bots.

Take note: It's not implemented on all blogs, yet. Only a handful of blogs has this feature - probably all will have it in the near future.

Wednesday, August 11, 2010

Tutorial: How To Set Password for Blogger Post

How to make blogger post private?
How to encrypt blogger post?
How to create blog post with password?

First, please proceed to http://www.vincentcheung.ca/jsencryption/instructions.html.

Go to Dashboard > Design > Edit HTML.

Then add the JavaScript decryption code after the <head> tag in the HTML code of your blog. Copy and paste the following code:

<script type="text/javascript" src="http://www.vincentcheung.ca/jsencryption/jsencryption.js"></script>

Then proceed to http://www.vincentcheung.ca/jsencryption/.

You'll see this page.

form empty

Then type for secret key at the "Key" area and the secret message at the "Plain Text" area.

filled form

After doing so, hit the Encrypt button under the "Plain Text" area.

Then scroll down a little and you'll see the "HTML Code" area. Highlight, copy and paste the HTML code into your POST EDITOR.

html code


And that's it!

Here's the result of the example shown. The secret key is "the key". Go and click on it.


Sunday, August 8, 2010

How To Use Own Photo as Blog Background

How to add photo as Blogger blog background?
How to upload own photo to blog background?
How to change blog background to own photo?
How to modify Blogspot blog background to own photo?
How to put image as blog background?

Blogger in Draft's Template Designer now has a new feature which allows users to upload their own photos as background easily.

To do so, go to Dashboard > Design > Template Designer > Background.

blogger upload image

Click on the "Background image" and you'll be able to see the "Upload image" feature. Click it and you'll be able to select the preferred picture as your blog's background.

According to Blogger in Draft blog, for images that fill the entire background, a resolution of 1800px wide and 1600px high is recommended and image size less than 200KB to minimize loading time of the blog. It support JPEG, GIF, and PNG format images.

At the end, additional background settings are available by using the Alignment, Repeat and Scroll options.

Sunday, July 4, 2010

New Stats Feature on Blogger in Draft

Is there a statistics feature on Blogger?
How to check traffic on Blogspot?
How to see statistics and analytic of my blog?

Here's a new feature implemented by Blogger, however in Blogger in Draft for the moment. Once it's finalized, it will probably be implemented on Blogger as well.

blogger in draft stats

Once you're on the Stats page, navigate yourself on the navigation to see more detailed information. The stats can be changed depending on your choice - Now, Last Day, Last Week, Last Month or All Time.

stats navigation

Overview Section

On the Overview page, the page views is shown.

page views

Blog posts with the highest page views.

blog posts with page views

Short summary of the traffic sources and audience.

traffic sources and audience

So basically it's like a summary. The stats of the blog can be roughly seen on this page.

Posts Section

On the next page, the Posts page, the more blog posts with the top highest page views will be shown.

top highest page views

From this, blog posts are giving the blog most traffic can be identified.

Traffic Sources Section

On the Traffic Sources page, more details can be obtained. The referring URLs, also known as links, that direct traffic to your blog.

referring links

The referring websites. Shows which website gives the blog the organic traffic.


And the referring keywords as well. Usually these are the keywords people search on Search Engines and got into the blog.

referring keywords

So these information is basically the sites and links that has given traffic to the blog.

Audience Section

On the last page, the Audience page, there's a page views statistics categorized by countries. Visitors' location can be identify by looking at the illustrated map and list.

page views by countries

Also, page view categorized by web browsers. The top used browsers used to access the blog can be known too.

page views by browsers

And lastly, page views by operating systems. Pretty self-explanatory.

page views by operating system

All in all, a little information about the visitors can be seen here.

Besides this default stats feature, other external Traffic Tracker and Statistics on your Blogger blog as well.

Saturday, July 3, 2010

How To Remove Blogger Navigation Bar in Template Designer (Update)

How to delete navigation bar on Blogger Draft template?
How to remove default bar on Draft Template Designer?

blogger draft navigation bar

It can also be done via this method. Navigate yourself through:

Dashboard > Design > Template Designer > Advanced > Add CSS

And then add this:

#navbar-iframe {display: none !important;}

Click "Apply to Blog" and you're done.

Credit: Comment by Bytexpert

P/S: Click here for the previous workable method.

Sunday, June 20, 2010

How To Buy Custom Domain for Blogger

How to buy domain for Blogspot blog?
How to add custom domain on Blogger blog?
Where to purchase custom domain for Blogger?

Firstly, head to:

Dashboard > Settings > Publishing

Then click on Switch to "Custom Domain".

custom domain

So now you're on the page where you buy a domain for your blog via Google Apps. A domain costs USD10 a year.

Enter the domain address you desire and check on its availability by clicking on the blue button beside.

enter custom domain

Take note: Your readers won't be left behind!

notice

So there's no need for your readers to change your link on their blog roll because it will be automatically redirected to your new domain.

After checking its availability, you will redirected to a new page with information regarding the domain.

domain information

If you noticed below, there's a phrase "Powered by GoDaddy.com" or "Powered by eNom". These 2 are the domain registration partners of Google. Click on "Learn more" to switch between them. I would suggest GoDaddy.com.

godaddy and enom

Then, continue with the registration.

Enter your domain name information and remember to check "Automatically renew my registration every year" if you want to keep this domain.

renew domain

Follow the rest of the instructions and it's pretty simple. Do remember to have your credit card/debit card ready as well.

All the best!

Related Posts Plugin for WordPress, Blogger...
Follow Me on Twitter