Monday, October 17, 2011

Blogger Open Image with Lightbox

How to open image with Lightbox on Blogger?
How to open image with Lightbox on Blogspot?
Show image with Lightbox on Blogger.
Show image with Lightbox on Blogspot.

Blogger has recently added a new feature for the photos and images on the blog posts. With the new Lightbox feature, the images can be clicked and be displayed with a darkened background.

blogger image lightbox

Also, all the images and photos within the blog post will be listed below, allowing readers to view them one by one - like a slideshow.

Currently, Blogger blogs in default have "Open images with Lightbox" setting enabled. To configure it, go to Dashboard > Settings > Formatting.

Then you'll see the setting mode for Lightbox. Either yes or no.

blogger lightbox setting

According to the description: If yes is selected, when a reader clicks on an image in a post, it will be displayed in a slideshow-like overlay instead of leaving your page and navigation to the image.

It could seem rather annoying if readers unintentionally click on it. But if your blog is a photography blog, it's definitely suitable.

Thursday, September 1, 2011

Blogger New Interface Layout

Blogger has released a new layout on its Original Blogger site (note: not Blogger in Draft) and you can try the updated Blogger interface with just a click, that's if you're still on the old Blogger interface.

blogger old layout

This is the outdated (or old if you prefer) interface/layout and it has been around for quite some time.

And this... is the new updated interface by Blogger.

blogger new layout

Looks whiter and more organized than the previous interface, with a tinge of orange color. Probably competing with one of their closest competitor, Wordpress, the new layout seem to grasp a more professional look.

If you have a few blogs, you'll see them being listed one by one on the main page. To have a better control over each individual blogs, just click on the blog name and you'll be directed to the overview page.

blogger new layout overview

On the overview page, there will be statistics and updates (comments, post count, follower count, etc) displayed. On the left had side, the navigation panel allows you to work on numerous features, none of which is new though.

blogger new layout posts

On the posts page, it looks similarly like Wordpress - with number of comments with a speech bubble, the views (statistics) and date. The controls are similar to Wordpress too, but definitely a good improvement by Blogger.

blogger new layout comments

Whereas the comment section lists all the comments in a chronological order, with the latest one at the top. However, Blogger should further improve this section by removing the "on blog post" from the written comment. Perhaps a new column will do.

blogger new layout editor

The post editor section is almost the same, despite the change of layout. With the post settings grouped together at the right side, it's more convenient to configure the settings. Blogger now allows the "Location" to be included as well.

For more information about the new layout, check out Blogger's Fresh New Look on the Official Google Blog.

Author's note: It normally takes time to adapt to a new layout. I agree so I'm gonna stay with the old interface for a little longer.

Thursday, August 18, 2011

OnBux Down Forever?

Yes, OnBux is down for quite some time already and one could only wonder - was it intentionally done? Was the hard-clicked money earned by their users too lucrative to be taken (scammed) so that they purposely close down the site?

onbux down

Was there an issue with their hosting? But many would conclude that it's a scam attempt.

Goodbye OnBux, you've been good actually - except for the remaining credit you didn't pay up.

Saturday, July 30, 2011

Flavors.me - Homepage in Minutes

Here's a cool way to create your own homepage in just minutes - with flavors.me. To be exact, it's just a 1-page homepage that allows you to link all your other social media accounts on it.

flavors.me homepage

To get started, you'll require to register for an account. It's easy and quick.

Before moving on the the features and details of flavors.me, let's go through some of the existing flavors.me profiles.

flavors.me profile 1

flavors.me profile 2

flavors.me profile 3

After registering, you can immediately start to customize your profile. The editing tools are easy to be understood, easy to navigate and watch real-time changes onto your profile display.

flavors.me customize

You can customize your layout, fonts and colors in real-time. Just click, and the changes will appear almost instantly. Therefore, you are allowed to modify it to meet your preference.

flavors.me content

Once the appearance is done, add some of your favorite social media accounts to your profile. Link your Wordpress blog, Facebook profile, Twitter account or even YouTube channel.

If a visitor checks out your profile page, he can then access all your linked social media accounts - almost like a 1-stop homepage center.

flavors.me stats

Other than that, there are stats available but real-time stats are a paid-only feature.

Actually, there is nothing much about flavors.me if you're just using the free version. Most of the functions and features are locked away, unless you're willing to pay the fee.

And if you're willing to pay, it's $20 a year.

flavors.me payment

Upon paying, there will be unlimited services available. You can get a custom URL, directory listing, real-time stats, contact form and custom content.

That's it.

Also, there is another similar website called about.me. It's way better than flavors.me so feel free to check it out.

Friday, July 8, 2011

About.me - Custom Profile & Personal Analytics Dashboard

Here's a great method to create your own customized profile almost instantly - check out about.me. It's a website where you can make your own 1-page profile and display multiple links to your other social media sites.

about.me homepage

Here are some of the available examples of about.me profiles.

about.me profile girl

about.me profile man

about.me profile dude

After registering, you can start your own profile. The editing tools are pretty self-explanatory and you can navigate easily and see the real-time changes to your profile on the screen.

about.me profile edit

Once you have created your own about.me profile, you can track the profile statistics - such as the profile views, clicks on the profile and external links to the profile.

about.me profile stats

Besides that, you can check your Klout influence statistics - basically it's the score of your influence with your social media accounts connected to about.me.

about.me klout

Also, about.me analyzes your style and influence with your online activities. Your Klout style will be shown. The top 5 people you're influenced by and the top 5 people you influence will be displayed as well.

about.me style

For me, they are more or less from Twitter (since I added Twitter as one of my links), normally determined when they @mention you.

So what are you waiting for? Get your about.me profile now! It's cool!

Also, there is another similar website called flavors.me. Not as good as about.me but feel free to check it out.

Saturday, June 18, 2011

Blogger in Draft Favicon Upload Shows on Blog List

How to show favicon on Blogger's Blog List gadget?
How to show favicon on Blogger's Blog List widget?
How to show customized favicon on Blogger's Blog List gadget?
How to show customized favicon on Blogger's Blog List widget?
How to replace Blogger default favicon with customized favicon?
How to replace Blogspot default favicon with customized favicon?

To know how, please go to How to Add Favicon with Blogger in Draft for the step by step guide.

After uploading, you'll see the new customized/uploaded favicon on the Blogger Page Element page.

favicon upload

The interesting thing about uploading your customized favicon with this new feature on Blogger in Draft is - the favicon shows on the Blogger's Blog List element when being linked.

Here's an example...

favicon display

Normally, when the conventional favicon adding via HTML method is used, the customized favicon won't appear on the Blog List and the default Blogger favicon remains there.

But with this new customized Favicon Upload feature, Blogger has certainly took a big step in fulfilling what the Blogger bloggers need - a favicon for the blog's identity!

Friday, June 10, 2011

How to Add Favicon with Blogger in Draft

How to add favicon?
How to create favicon for Blogger blog?
How to create favicon for Blogspot blog?
How to add favicon to Blogger blog?
How to add favicon to Blogspot blog?

Back then, you'll need to play around with the blog HTML code in order to have a customized favicon. But now, you can add a favicon easily with Blogger in Draft!

Here's how.

First, go to Blogger in Draft. Then go to Dashboard > Design.

blogger favicon

There is a Favicon page element where you can add your own customized favicon by clicking on the "Edit" link.

blogger add favicon

A pop-up window will appear and all you have to do is to select the favicon (with an .ico format) from your computer and just save it! As easy as that.

If you're not sure on how to create a favicon .ico file, continue reading.

---

How to create favicon (.ico) file?

Firstly, an icon is required. You can either use an online icon creator (which may not be user-friendly) or Photoshop.

Once you've designed your icon, save it as an image file. Next, proceed to the online icon generator to generate the icon. There, upload your saved favicon image, select icon size 16x16 and generate it. Once it's done, download the icon into your computer.

Then you can use the downloaded icon and select it as the favicon (.ico) file.

Sunday, May 15, 2011

How to Redirect A Site to Another Site Automatically

Code to redirect a website to another website
Code to automatically redirect a website to another website
Code to refresh a site to another site automatically
Code to automatically refresh a site to another site automatically
Code to refresh a webpage to another webpage automatically
Code to automatically refresh a webpage to another webpage automatically
How to redirect a website to another website
How to automatically redirect a website to another website
How to refresh a site to another site automatically
How to automatically refresh a site to another site automatically
How to refresh a webpage to another webpage automatically
How to automatically refresh a webpage to another webpage automatically

---

Here's how.

First, go to Dashboard > Design > Edit HTML. Then, just insert this code below <head> tag.

<meta content='5;http://www.web.com' http-equiv='Refresh'/>

To change the refresh time, change 5 to another number. It represents the seconds needed to redirect/refresh the page to another website/page/domain. Putting 0 means immediate refresh and the viewer won't be able to see the landing website/page/domain.

To set the target website/page/domain, change www.web.com to your desired target website/page/domain.

After that, Save Template and it's ready to redirect/refresh!

It's suitable for redirecting your Blogspot/Blogger blog to your own (new) domain hosted by a web host or you simply want to auto-redirect an old blog post to a new blog post.

Saturday, April 9, 2011

Use OnBux instead of NeoBux

NeoBux VS OnBux
OnBux VS NeoBux

As of update on 9 April 2011: If you're on NeoBux and remains at an ordinary account, you'll only earn $0.001 per click! That's 1/10 of the previous earning, which was $0.01. The change was made quite recently.

That really sucks and therefore, head on to OnBux, which will still earn you $0.01/click!

Here's the Math of cashing out your first $2.00 with both NeoBux and OnBux:

NeoBux: $0.004 (4 clicks/day) x 500 days (1 year plus!) = $2.00
OnBux: $0.04 (4 clicks/days) x 50 days = $2.00

Therefore you can't earn fast with NeoBux, and as a result - it takes longer (1 year plus?!) to cash out your earning from NeoBux.

onbux banner

So, register with OnBux, which will earn you $0.01/click - and earn within months! Click here for proof of payment from OnBux!

Saturday, March 19, 2011

Neobux Payment Proof

UPDATE 9 April 2011: If you don't upgrade your NeoBux account and remains at an ordinary account, you'll only earn $0.001 per click! That's 1/10 of the previous earning, which was $0.01. Therefore you can't earn fast. Head on to OnBux, which will earn you $0.01/click! Click here for proof of payment from OnBux!

---

Just received anotber payment from NeoBux.com!

Here's the proof:

neobux payment

Above is the email sent to my email after the payment is made to my PayPal account.

neobux payment paypal

Above is the payment statement as shown on my PayPal website - sent by Neobux.

There you go, it's the proof that NeoBux.com, the pay-to-click website, works! Just spend about 5 minutes a day to click a minimum of 4 advertisements and earn as little as $0.004 (it is actually lesser now) a day! You gotta be consistent.

Feel free to check out the site, register an account and earn passively by clicking everyday!


Do check out the NeoBux guide too. Happy earning online.

Thursday, February 17, 2011

OnBux Payment Proof

Just received my first payment from OnBux.com!

Here's the proof:

onbux payment

Above is the email sent to my email after the payment is made to my PayPal account.

onbux payment paypal

Above is the payment statement as shown on my PayPal website - sent by onBux Ltda.

There you go, it's the proof that OnBux.com, the pay-to-click website, works! Just spend about 5 minutes a day to click a minimum of 4 advertisements and earn as little as $0.04 a day! You gotta be consistent.

Feel free to check out the site, register an account and earn passively by clicking everyday!

onbux banner

Do check out NeoBux too. It works the same and you can earn from both!

Saturday, January 15, 2011

How to Add Blogger Sitemap to Google Webmaster

How to get sitemap for Blogger?
How to get sitemap for Blogspot?
How to add sitemap for Blogger to Google Webmaster?
How to add sitemap for Blogspot to Google Webmaster?
How to enter sitemap to Google Webmaster for Blogger blog?
How to enter sitemap to Google Webmaster for Blogspot blog?
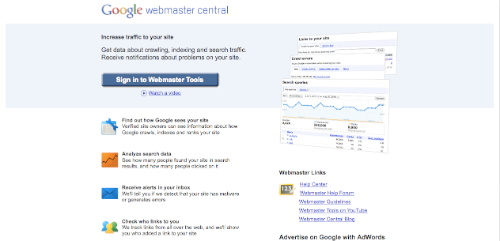
First, go to Google Webmaster and sign in with your Google Account.

google webmaster site

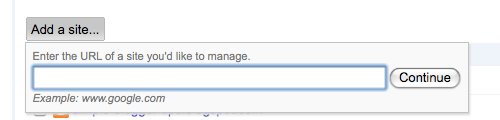
Then, if you have not added your blog, click on "Add a site..." first.

google webmaster add a site

After adding your website, you'll need to verify the site ownership by added a meta tag on your blog. Follow the instructions displayed.

Then, proceed to the dashboard of the site.

google webmaster dashboard sitemap

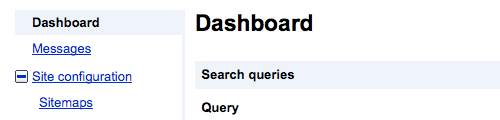
On the left sidebar, expand "Site configuration" and click on "Sitemaps" below it.

Then the next page is where you submit the sitemaps for the blog.

google webmaster submit sitemap

Click on "Submit a Sitemap" and enter the following link extension:

1) This is the basic sitemap you submit first.

/atom.xml?redirect=false

2) Then enter the second sitemap. This is to index the first 100 posts on your blog, which means post number 1 until post number 100.

/atom.xml?redirect=false&start-index=1&max-results=100

3) If you have more than 100 posts on your blog, submit this link as well. This will index post number 101 until post number 200.

/atom.xml?redirect=false&start-index=101&max-results=100

4) If you have more than 200 posts on your blog, submit this link as well. It will index post 201 until 300.

/atom.xml?redirect=false&start-index=201&max-results=100

5) Continue adding new sitemaps if you have more posts.

Take note that the more posts you have on your blog, you have to add more sitemaps to index every hundredth posts. Refer to the number in orange and it's pretty self-explanatory.

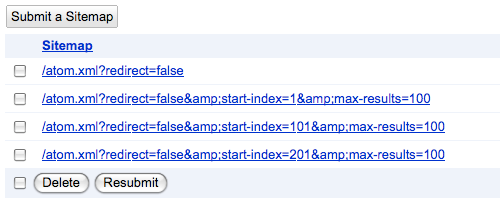
After submitting the sitemaps, your sitemap list will look more or less like this:

google webmaster sitemap list

The sitemap links above can accommodate 200 plus blog posts only. If the number of posts exceeds, more sitemaps have to be added for every hundredth.


Why is this "Sitemap submission" necessary?

It helps Google index your blog more efficiently and ultimately provide more traffic to your site via its search engine.

Go ahead and add your blog's sitemap to Google Webmaster now!

Saturday, January 1, 2011

How to Remove Attribution Widget on Blogger

How to remove attribution on Blogger?
How to remove copyright widget on Blogspot?
How to remove line at the bottom of blog?

If you're using a template by Blogger's Template Designer, most of them have an attribution widget at the bottom of the blog.

Take a look and it's something like this...

blogger attribution widget

You're able to modify only the "Copyright" statement from the widget.

If you want to remove this Attribution widget at Design > Page Elements, you see that it can be edited...

blogger attribution widget

But unlike the other normal widgets, you won't be able to remove the Attribution widget because it doesn't have a "Remove" button.

blogger attribution widget

If you insist on removing the widget, here are the steps to remove the attribution widget on Blogger. It's pretty easy and understandable.

1) First, go to Design > Edit HTML > Tick "Expand Widget Templates". Search for the word "attribution".

blogger attribution widget

2) When you see the Attribution widget code (refer to image above), change the "true" on locked to "false".

3) Go back to Design > Page Elements.

blogger attribution widget

4) Since the lock function is disabled (by changing the code to "false"), it's movable and can be removed as well. Click on "Edit" on the Attribution element.

5) And now with the "Remove" button available, you can finally remove the Attribution widget for good.

blogger attribution widget

Done!

Related Posts Plugin for WordPress, Blogger...
Follow Me on Twitter